Home Improvement and Family

James’ dad came to town for a week and they used the time to work on some home projects. There was also plenty of time for some fun.

James was very excited about using his new tools for this project and I was stoked to have a revamped laundry room. This was a project that I’ve had on my list for a while but only recently voiced to James. I forgot to take a before photo so this one is right before they removed the washer and dryer. There was one of those pitiful wire shelves above them that really didn’t afford much storage. It was a sad room. 

Ready to paint!

I really wanted an enclosed cabinet but we were limited on choices because of the lowered ceiling. James actually found this one at Home Depot and it was a little more than I wanted to spend but was the best option for the most space. We saved money though by using leftover paint from our master bath. It’s a Benjamin Moore color, Ozark Shadows. I would have loved to choose a mint or coral color but in the end this is better….I have plans for a few fun prints and what not to dress it up a bit.

I took a quick iPhone photo of the finished room. I’ll do a better one once the cabinets are painted white to match the shelf and I add a few other things to make it pretty. The exposed shelf was a must for me because I didn’t want to open a cabinet every time I needed laundry soap. I also thought it worked better for the dispenser. The guys did a fantastic job and I am so happy with the space now, especially since I didn’t have to do any of the work. It’s a great upgrade!

The laundry room took them about a day and a half so on Father’s Day they spent their time in the garage building a work bench for James. It’s a pretty cool design that folds down when not in use which is perfect for our tight garage. Here you can see James’ new Jawhorse in action along with a few power tools. I’ll have to get a photo of their finished project which they did in one day! Impressive.

In between all the work, there was time for fun too. Saturday was my family’s annual reunion in San Antonio so we spent the day down there. William pretty much stayed in the pool the whole time with Maria, who he was very happy to see. It was a beautiful day and a great time catching up with family when I wasn’t on toddler duty. It’s awesome to see the cousins I grew up with having their own kids now and seeing all our kids play together. I am a little bummed I only took photos on my iPhone and didn’t get any other family photos but my cousin organized a big family photo so I can’t wait to see that.

William also experienced his first pinata. It was awesome. He loved that we gave him a stick and told him to hit something. We ran into a problem though when the pinata broke open. He didn’t like that too much. I think he was bummed he couldn’t hit it anymore. It was still too cute.

The day ended much too soon and we headed home with a very sleepy boy.

Today was a total fun day since it was Opa’s last day before heading home. We started the morning off with a visit to the Cat sales and service plant near our house. We drive by it all the time and William always has something to say about the big construction equipment on display. This time we actually stopped and did a little tour up close. I wonder what was going through William’s head. He seemed pretty impressed.

If you know William really well, you’ll know exactly what he is saying in this photo….”All dirty!”

After the construction equipment we made a quick stop for donuts before heading to Zilker to catch a ride on the Zephyr.

We had to wait a bit for the next train so William had a chance to check out the playground.

We didn’t spend a whole lot of time at Zilker growing up and I am sorry to say I hadn’t ridden the Zephyr before today. I’ve wanted to take William for a while now and was really excited to experience it with him today. He was such a tired boy by the time we boarded, he actually fell asleep for a few minutes on our way back to the depot. It was so cute and funny.

What a full but fun week. I know William loved spending time with Opa and I am pretty sure all the boys had fun using a lot of power tools.

ReFashion | Maxi Dress to Maxi Skirt

I bought this dress at Forever21 a couple years ago and wore it a few times then washed it. Well, thank you F21 for selling such good quality clothing…not. The shirred bodice started to unravel. I wore it again at Easter but rolled the bodice down and covered it with a wide belt. It worked but was hard to recreate.

Here’s a photo where you can see it a bit. 

I really love the colors and pattern of the skirt so getting rid of it was hard. I almost did it a few times.

Last week I was on a “make it work” kick (thank you Tim Gunn). I had a day of mending, sewing on buttons and finishing up a project from April so I could start on new projects. Turning this dress into a skirt was on my list and it was super easy. The days Project Runway is on also motivates me for some reason too…..

It actually wasn’t that flattering as a dress. The bodice was too small and the length was odd on me. It also didn’t stay up too well – my problem with a lot of strapless things.

I chose a point and went to town with a pair of scissors.

The narrow band of elastic at the base of the bodice, I used as the new waistband elastic. Score. I thought I was going to have to put in elastic for the waistband.

I then folded the remaining section of the bodice down over the elastic and stitched in place. It’s not the most finished or perfect waistband but I figured I’d be wearing a belt or cardigan over it anyway.

Finished! I put it on so you could see better how it looked.

It’s much longer now and will be great with sandals now or flats when it cools down a bit more. Yay! I love maxi skirts. They are my go to when I don’t want to shave and don’t want to wear pants. Haha!

Next up to ReFashion is a t-shirt from H&M that is too small in the shoulders.

DIY Painted Kitchen Table

We’ve had this table since we got married. It was a gift from an old roommate and a blessing because we didn’t have a budget for a lot of furniture in the beginning. I love how small it can be but also with two leaves, it’ll fit at least 10 people. Perfect at the holidays. The original chairs we quickly replaced and then talked about how we could change the table to better fit our style. Well, we talked about it for 5 years. We couldn’t decide what we wanted to do….stain or paint? This was the original look – natural pine. It wasn’t bad actually and contrasted with the dark stained chairs.

The Friday night of Labor Day weekend, after dinner, I suggested we redo the table. James had a three day weekend and we didn’t have any plans, it was a great idea. After a little Pinterest-ing (you know, Googling on Pinterest), we were off to Home Depot for supplies and Harbor Freight for a hand sander (James was very excited for a new power tool). My goal was to stay under $60 to stain the table to match the dark wood of the chairs.

All day Saturday was spent doing a light sanding on everything because it had a thin, clear finish. On Sunday, I started staining the legs just to see how the stain would take and look. We went with an American Walnut because we couldn’t find a stain that would match the chairs exactly. We thought that would look funny so we decided to go with something darker that wasn’t as dark but would still contrast.

I am not sure if we did something wrong, like not sand enough or not have enough patience, but the American Walnut wasn’t working for us. It looked orange on the pine and not much darker than what it was before. Maybe after 3 or 4 coats it would have worked? I don’t know. Not an expert. So after some discussion, it was back to Home Depot for a darker stain. 

Ebony to be exact. I did a small section to see what it would look and nope, not a good look. Again, maybe we weren’t patient enough or knowledgeable enough to work with stain and should have kept going but we were tired of wasting time and money. With two days gone and our $60 budget blown it was time to make a decision.

It was back to Home Depot for primer and paint. White paint. Yes, we probably should have done this to begin with because now that it’s finished I love the look.

On went a coat of primer, two coats of paint and 3 coats of poly. It took a full week with drying times and our schedules.

There was more sanding involved (I hate sanding) after primer coats and in between poly coats. It probably could have been sanded more but we wanted out kitchen table back. This is William and I laying on the kitchen rug, having a snack.

We used foam brushes for the legs and apron and a sponge roller for the table top both for painting and priming.

You can see it’s not as smooth as it should be. It’s most definitely far from perfect but I still love how it came out.

I used a satin paint but a semi-gloss poly for a little shine. I didn’t want it to be too matte and feel rustic.

We thought about adding a red stripe around the edge of the table to match the orange table but I decided against it at the last minute. This is not the American Red Cross headquarters.

The finished table! We’ve been using it a few weeks now and it’s been a nice change. I love how it brightens the kitchen and looks against my rug.

If you want more information on steps and supplies, I can tell you what we used and my steps or you can check out this gals blog. I used the same primer and tools she did. For the paint I went with Behr. I wanted to keep track of how much we spent too but after the 3rd trip to Home Depot, I gave up. Pretty sure it was more like $100 and not $60. Since the table didn’t cost us anything, I think it all balanced out in the end and 5 years later we have a new to us table.

Even though James and I worked well together on this project, I don’t think we are DIY-ers at heart. We won’t be going YHL on you here anytime soon and that is ok with me. I’d like to re-tile two of our bathrooms here soon. You better believe I’ll be hiring a pro.

Progress in William’s Room

If you followed my old, personal blog, you’ll know that William’s room has been a work in progress since before his birth. I told James it will probably always be a work in progress too…just like the whole house is. Sorry, babe! Hey, it’s my thing.

Anyway, I made a few changes to William’s room recently. I rearranged the furniture just to try something new. I am also redoing what I’ve had on the walls. One of my favorite new things are the Ribba ledges we added last week. Well, James added them. William and I supervised for a bit then went to make dinner. William didn’t like the drill too much anyway.

I saw the Ribba ledges being used as book ledges on Pinterest and loved the idea. William has a lot of books so displaying them this way clears out his basket a bit (and the surrounding floor) but also allows us to use them as decor too. The covers are so colorful and cute. Why not display them? Some of the books are also not quite his age friendly either so the higher shelves will help keep them intact until he can really enjoy them. 

I am planning on a full post one day soon to show off his whole room. If I ever get to a mostly finished point.

A Week in Photos

It didn’t seem like a busy week to me but it did go quickly. I didn’t have enough dedicated time for blogging but I do have a lot to share that will be posted soon.

We were very happy to have James home last Sunday night after his weekend at a conference in Florida. I honestly don’t remember a lot about the rest of the week (I am pretty sleepy as I type this)…I did some sewing and baking. I had my Spring Mini Sessions yesterday and spent a good part of the week location scouting and visualizing those shoots. They went really well! I can’t wait to share some peeks soon. Today I finally got to see my brother and his wife, they rolled into town Friday. They also met William for the first time. We took the opportunity to do a big family photo today and lots of other photos which I am really excited about. It was a good week an even better weekend.

I hope you all had a lovely, Spring weekend!

William’s First Birthday | 03.08.2013

William’s party was a blast. He was completely worn out by 4pm and I am so surprised he lasted that long (especially without any naps!). With help from my mom and sisters, I pulled off his Dapper Little Man theme.

The party was actually the day after his birthday, so on his birthday, we FaceTimed with Oma and Opa and opened their presents. They got him this really cool bike that he can either ride or walk and push. He loves to go fast on it!

I did as much decorating that night as I could because I knew the next day would move quickly. I decided to try and keep things simple – just a few decorations and only sweets and fruit for snacks. The only decoration I made was the bunting. Using scrapbook paper from Archiver’s, I cut out neck ties and bow ties and then attached them to baker’s twine. I guess I also made the balloon bunting which was an idea I saw on YHL. It’s a great way to decorate with balloons. I also hung up tissue balls from ShopSweetLulu and two “collages” of photos of William.

One of the collages I did was 48 Printstagram prints of William in the shape of a one. I saw the idea for that on a friend’s Instagram feed. She did it for her one year old. The other collage was 13 photos of William, one on his day of birth and one from each month up to 12. They were 5×5 prints from my lab with a white border.

Some pre-party preparations….William is helping James get the drinks cold. Aunt Jessica is working her magic with the icing for the cupcakes. I made Blueberry Cupcakes with Blueberry Cream Cheese icing and a gluten-free, dairy-free yellow cupcake with a chocolate frosting. Both were really good! And I would not have had them decorated in time if not for Jessica. I don’t have patience for that stuff anyway. William was also on balloon testing detail. He LOVED the balloons. We still have a few left that he tosses around. I am pretty sure his first official word is ball.

I used a free printable from On To Baby for the cupcake labels and pieces of 12×12 scrapbook paper as a “placemat” for the cupcakes.
 
For William’s smash cake I made a mostly healthy cake. It was mostly applesauce and banana and pretty dense so I kind of wish I had just made him a real cake…the icing was buttercream and not healthy at all. I think he liked it and the blueberries the most. That would probably be the only “do-over” for me…a little bit of chocolate would have been just fine I am sure. At least it looked really cute!

We also had yellow cake pops with white coating and yellow sprinkles. I rolled them but my sister finished them (she is an expert truffle roller) otherwise they never would have made it to the table. They were a big hit with the kids (and adults). The gray chevron straws I also bought from ShopSweetLulu…it was a pack of 20 so we cut them in half.

These are the gluten-free, dairy-free cupcakes. I used a box mix and the frosting is mostly coconut oil, dark chocolate and vanilla. The consistency is different but there was only one of these left at the end of the night, so that must mean they were tasty.

I picked up this W at Michael’s and wasn’t sure how I was actually going to use it for the party but in the end it made a great centerpiece.

I really, really wanted a pinata for his party for the kids but decided to wait on those until he is actually old enough to enjoy it as well. My back up plan was miniature pinatas for party favors but I couldn’t find the right supplies so I went with something easier.

We had a wonderful turnout of friends and family – so many kids! I am afraid it was a bit of a crush though because the rainy weather kept us from using the patio and backyard. It was still fun though and I really enjoyed seeing so many people.

Maria and William show off their birthday outfits. Our next door neighbor has a little boy too who is 3 months younger than William. I love this photo of them…it looks like William is protecting his puffs.

Then it was time for cake. Can you tell he is sleepy?

He was pretty straight faced for a while, just politely eating his blueberries and watching everyone watch him. I love the top right photo….”You want me to make a mess? Do I have to?” He is so into wiping his mouth now with any towel or napkin he finds. Such a neat mister. The bottom right he hit sleepy/silly.

And finally some messy face action. That’s about as messy as it gets people. 
Allan and his wife, Lori were one of our first wedding clients back in the day and I am happy to say we’ve remained friends. Their little gal, Sarah just turned one as well. 

Heather is a fellow birth center mom and Miss Carrie turns one this week!

So many presents! And tissue paper!


Wearing his awesome fedora from his friend Zoe. He actually really likes it…I promise. He was ready for a nap at this point.

And what party is complete without an after-party? I know these two loved having all the balloons to themselves.William was in a much better mood after his nap and dinner.
Daddy put his bike together so of course he needed a test drive. 

 Bedtime snuggles and books with Aunt Jessica and Uncle Nathan. What a great way to end a fun day.

Happy Birthday to my dapper little one year old! It still seems like yesterday we brought you home and had no idea what to do with you. So we just held you and stared. I still stare sometimes and am amazed I have such a precious life entrusted to our care. What a fun, challenging, long, short, exhausting, educational and tremendous year it has been. William, I can’t wait to get to know you better as you grow and learn each day. I love you! ~ Mom

Sunny Days

A few weeks back I tackled our back yard. It was a sorry sight. Weeds, ugly garden, overgrown vines. I wanted a pretty and pleasant place to hang out with William during the summer.

I cleaned up the main flower bed and pulled out a lot of rotting wood borders. Just that alone improved things. After relocating some lantanas I planted some coreopsis, oxalis, stock, dusty miller, Shasta daisy, basil, rosemary and lavender. It’s so pretty and I just love to look at it. I can’t wait for the plants to fill in and bloom.

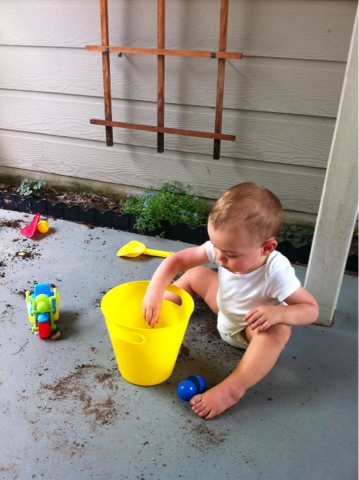
William and I are back here almost everyday. He loves the rocks, dirt and grass. I enjoy the sunshine, breeze and scent of stock as I watch him play.

Sew Finished

Before William was born, I continually said that if I didn’t finish his room before he came, it would never get done. Well, it was the truth. His room is 75% finished and he’ll be one on Friday. Eesh. I have to say though, that it’s been in a state of flux for a while too. It served as a guest room up until a few months ago so I was a bit limited on what I could do. But now that the bed has been moved, I am so ready to really and truly “finish” it. It probably doesn’t help that I keep changing my mind about things and want to paint….

One thing I did finally finish was his quilt. The fabrics I chose for his room are my favorite thing about the space and I love the colors and patterns.

It took me a while to decide what to use for the back of the quilt…one of the materials from the front or something completely different? I am glad I went with completely different. I love the black and white pattern and how it contrasts with the front.

I used this tutorial that I found via Pinterest to piece the front. Super easy and quick although I didn’t use a charm pack. It took me awhile to finish the quilt because I wasn’t looking forward to the binding and all that mess again. I did my nieces’ quilt with a binding and hated it…oh my gosh. Took forever. So when I found this tutorial, also via Pinterest (goodness, I adore Pinterest), I was ecstatic. Easiest thing ever!! I knew you had to be able to do a quilt without binding. I actually like how it looks a lot more too. I’ll definitely be making this same quilt again.

I really want to show off his entire room but the perfectionist in me won’t allow it until I’ve finished it for good. That won’t happen until I make a trip to Home Depot and Ikea to get some items that will help me wrap it up. Then maybe, just maybe, it’ll truly be finished for my boy. In the meantime, you can check out my Pinterest board to see my plans and inspiration.